Using Manual Entry
This tutorial coaches you to create a batch report by
entering your search criteria (NIINs) manually rather than by browsing
for an input file stored on your computer. It also goes through the steps
of setting a default output format (Default FLIS MS Excel Report) from
the available drop-down list.
 To create a batch
report with search criteria entered manually
- After you log in to Haystack
Gold, select Reports, and then
Batch Setup.

You are now at the BatchPlus
Settings page. All of the optional and required fields are available to
you from this screen.
 Note: Required
fields have been marked with an asterisk (*). All other fields are optional.
- In the Title field, enter
Sample Batch.
- In the Description field,
enter Sample BatchPlus Manual Entry.
This first section of the BatchPlus
Settings screen gives you the ability to enter a title and description
for your batch. Note that these two fields are not required; they are
available to provide additional detail when you view your list of batches
on the Batch Status screen. If you do not fill in these values, the batch
system applies default values.
- In the Database field,
select Federal Logistics Information
Service, which is the default setting. Users familiar with the
older Batch Input and Batch Upload had this pre-selected for them and
could not change this value.
- From the drop-down list
to the right of the Search Fields field, select NSN
or NIIN.
- To the right of the Input
File Name field, click Manually Enter
Search Terms to activate the search entry box.
- Into the search entry
box, enter 004357553.
- In the Format field,
select Default FLIS MS Excel Report
from the drop-down list.
 Note: Batch formats
that existed in the older Batch Input and Batch Upload are available in
the list of batches, identified with "(Standards)" preceding
them.
- In the Output File Name
field, enter ManualNIIN. (Note
that this field is optional and only filled in for the purpose of this
example.)
- For the Archive Type
radio buttons, leave pkzip Compression
selected. Large batches will automatically be compressed.
- Leave Save
batch input on server unchecked.
- Click the
 button.
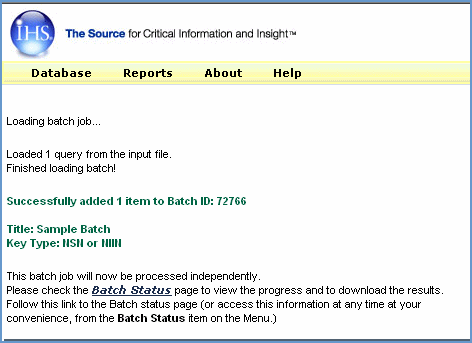
Your search criteria are loaded into the batch system, and you are
presented with a summary page of your batch jobs.

- To view a list of your
batch jobs, click the Batch Status
link.
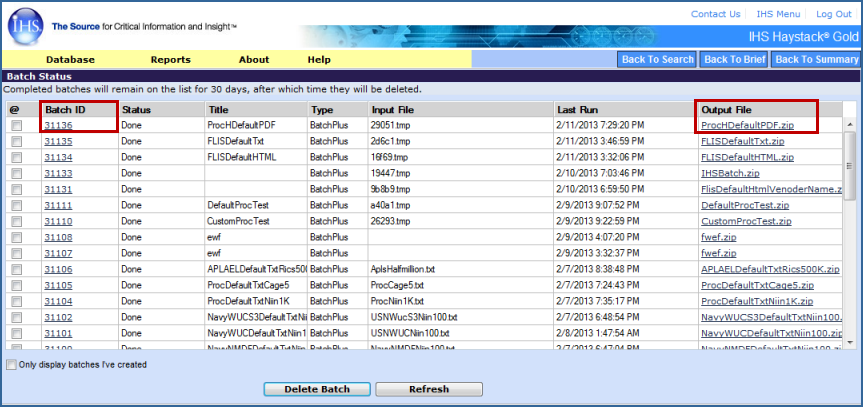
A list of all the batches you have processed is displayed on the Batch Status screen. (Click the yellow
boxes for more information.)

- Click your browser's
Back button to return to the Batch Status page..
- To view the output Excel
file in compressed format (ManualNIIN.zip) click the Output
File link on the far right. (Click the yellow box on the graphic
above.)
A Microsoft Excel spreadsheet is generated, containing all of the data
that matches your search criteria, as found in the FLIS database. Data
from each segment has been consolidated into separate worksheets, which
are available as tabs across the bottom of the spreadsheet. Data from
18 FLIS data segments is contained in the default output, including alternate
part number information (MCRL), Procurement History, and Lists of Items
Requiring Special Handling (LIRSH), etc.
You can save this file to your computer or print it.

![]() To create a batch
report with search criteria entered manually
To create a batch
report with search criteria entered manually


![]()